Debug idea2Life
1) Debug ai service:
** Debug endpoint:**
Note: For debug view of previous detections just open URL in your browser
After opening url http://<ip_address_of_flask_server>:5000/debug: you can see template detection of last 10 images.
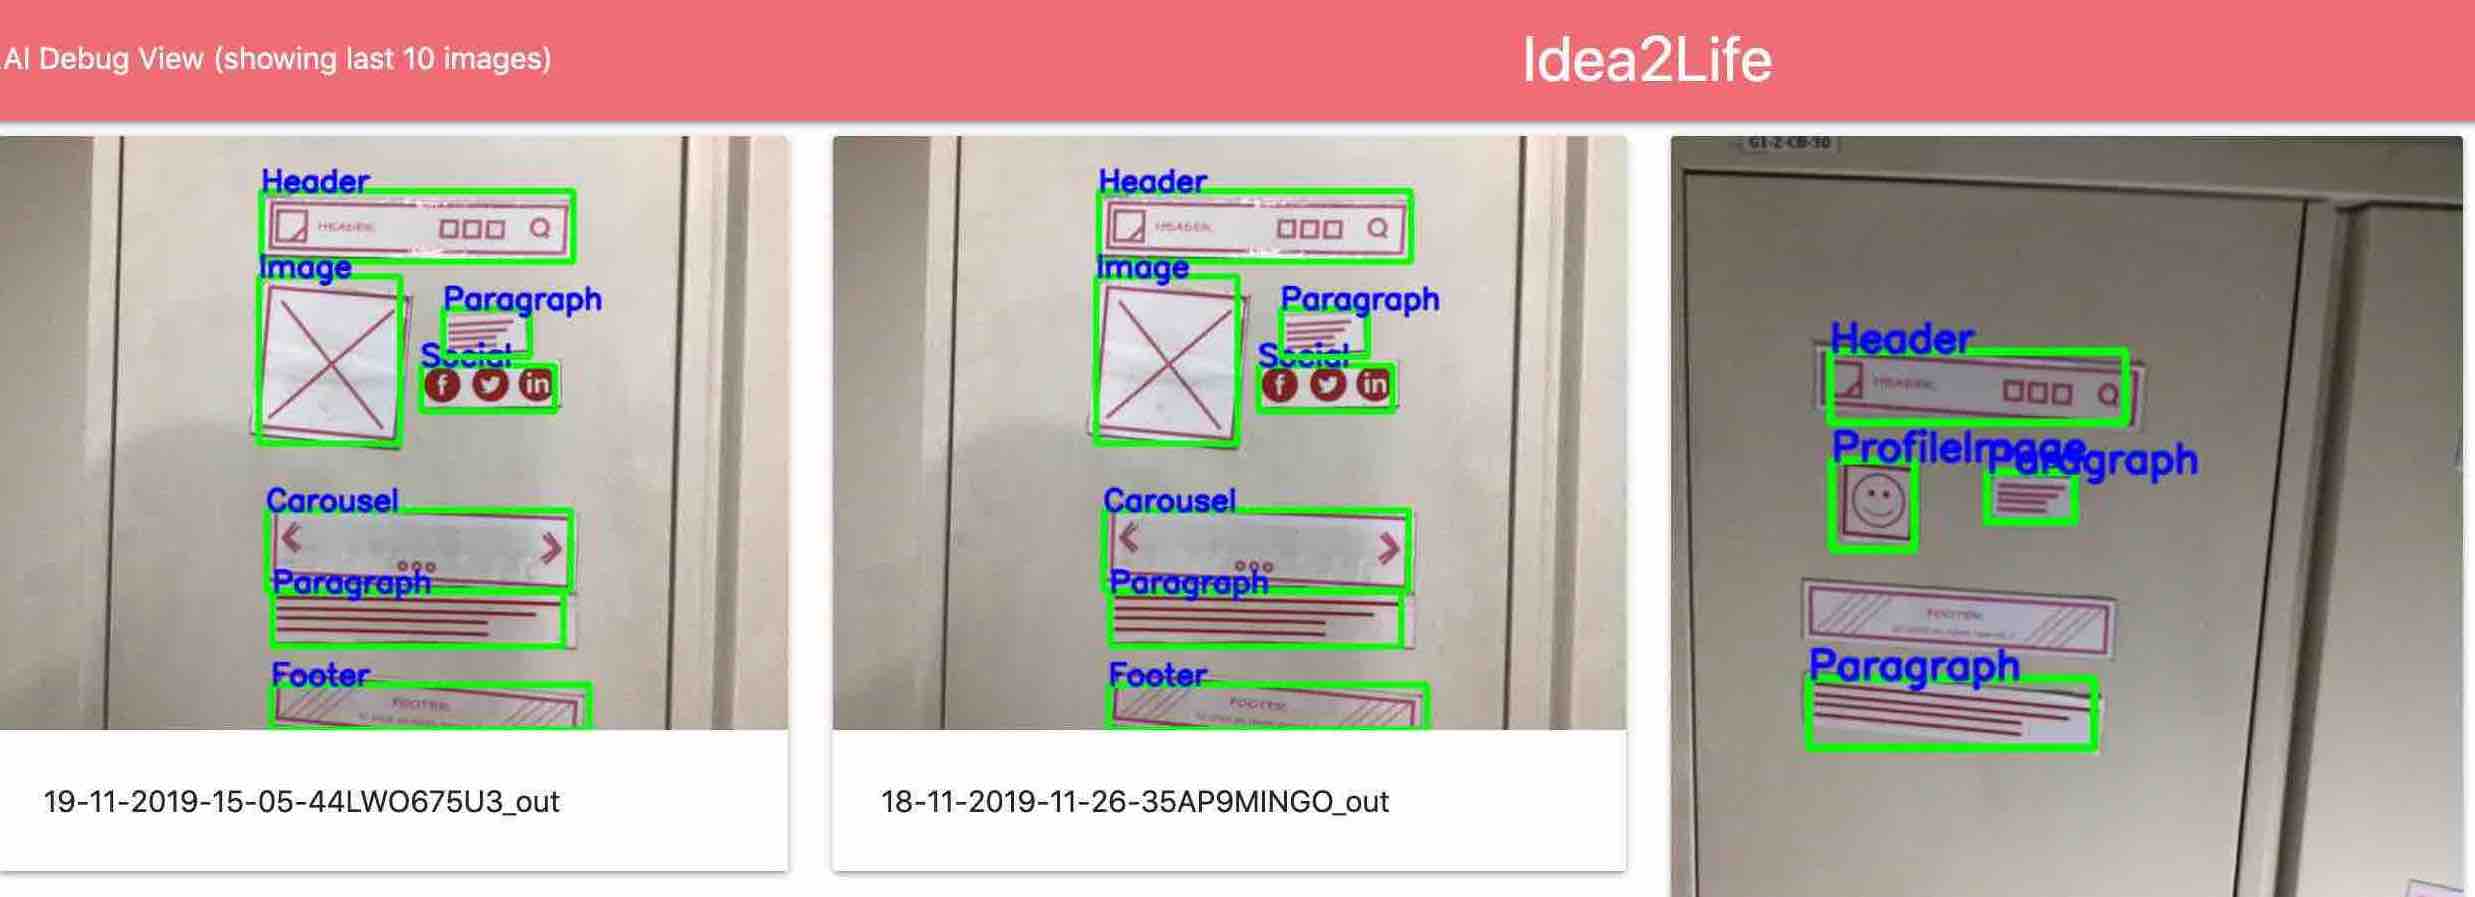
you can use this debug view for checking whether photo is clicked correctly, or your clicked photo has some detection error.
2) Debug idea2Life prototype page:
If you ever encounter error in using application with tablet/ipad or and do not have access of tablet device you can test application without camera using debug upload functionality. For after clicking on Prototype icon append /debug after camera screen. or alternatively you can type full url
https://<IP address>:1813/generator/ui/home/debug
this will take you to following page.
On this page you can see one additional icon to upload (as can been seen in the image below):

Once you click on the upload icon, you will see a pop-up to upload image.
3) Debug idea2Life layout service:
Layout service is responsible for generating XML data from the JSON position data generated from the AI service. The XML will give an intuitive representation of the layout DOM for page. In case you want to manually test the output of the layout module, you can send a POST request to https://localhost:port/layout/generate with the ai JSON data in the form:
{

    "height": "480",
    "results": [
        {
            "bottom": 60,
            "class": "Header",
            "left": 10,
            "prob": 0.789800226688385,
            "right": 400,
            "top": 10
        },
         {
            "bottom": 370,
            "class": "Video",
            "left": 175,
            "prob": 0.789800226688385,
            "right": 375,
            "top": 176
        }

    ],
    "width": "640"
}
Below is the sample XML content generated by the service:
<rows>
    <row id='R_R1' width='null' offset='null'>
        <component class='Header'></component>
    </row>
    <row id='R_R2' width='null' offset='null'>
        <component class='Carousel,Video'></component>
    </row>
    <row id='R_R3' width='null' offset='null'>
        <component class='Footer'></component>
    </row>
</rows>
The XML shows that we have 3 components in the layout : Header, Carousel & Footer.
Note - At present, we do not support width & offset values for components. You can expect this in furture release.
4) Debug idea2Life Generator (or rendering) service:
Generator service is responsible for generating html from XML data. Generator service use theme configuration to generate pages. Even the prototype page is generated using the generator service based on the selected theme. Generator service creates pages inside idea2life/userData, which can then be hosted on different server. Check Hosting Generated Webpages from idea2Life.
The protoype page is generated from https://localhost:port/generator/ui/home.
To test the html generated by the generator service, send a POST request to https://localhost:port/generator/create_html with the JSON data in the form:
{
    xml: xmlData,
    filename: pageName
}
This will generate a page inside idea2life/userData/ with the filename and can be viewed at list page (under customization).